
❋
How to Grow Dahlias
Dahlias are one of those flowers that so many people want to grow. They’re so diverse, and there’s a dahlia out there for everyone. When grown well, they will reward you with an abundance of blooms from late summer through frost. We hope this guide will help you find success with growing your dahlias!
❋ Understanding the dahlia growth cycleEach individual tuber is divided from a whole clump of tubers, which is formed over the course of the previous growing season. Where we grow in SE Massachusetts, we plant individual tubers in mid-May, and they multiply underground throughout our growing season, until about mid-October. After we get our first killing frost, all the above-ground vegetative growth is cut back, and we dig up the tuber clumps that have formed since May and store them away until late winter (February-ish). At that point, the tuber clumps are removed from storage, thoroughly rinsed, and divided into individual tubers, multiplying our stock and allowing us to sell some to home gardeners. This process is known as cloning or propagation through tuber division. This method yields plants that are true to the original plant. You can grow from seed, but that’s a story for a different growing guide!
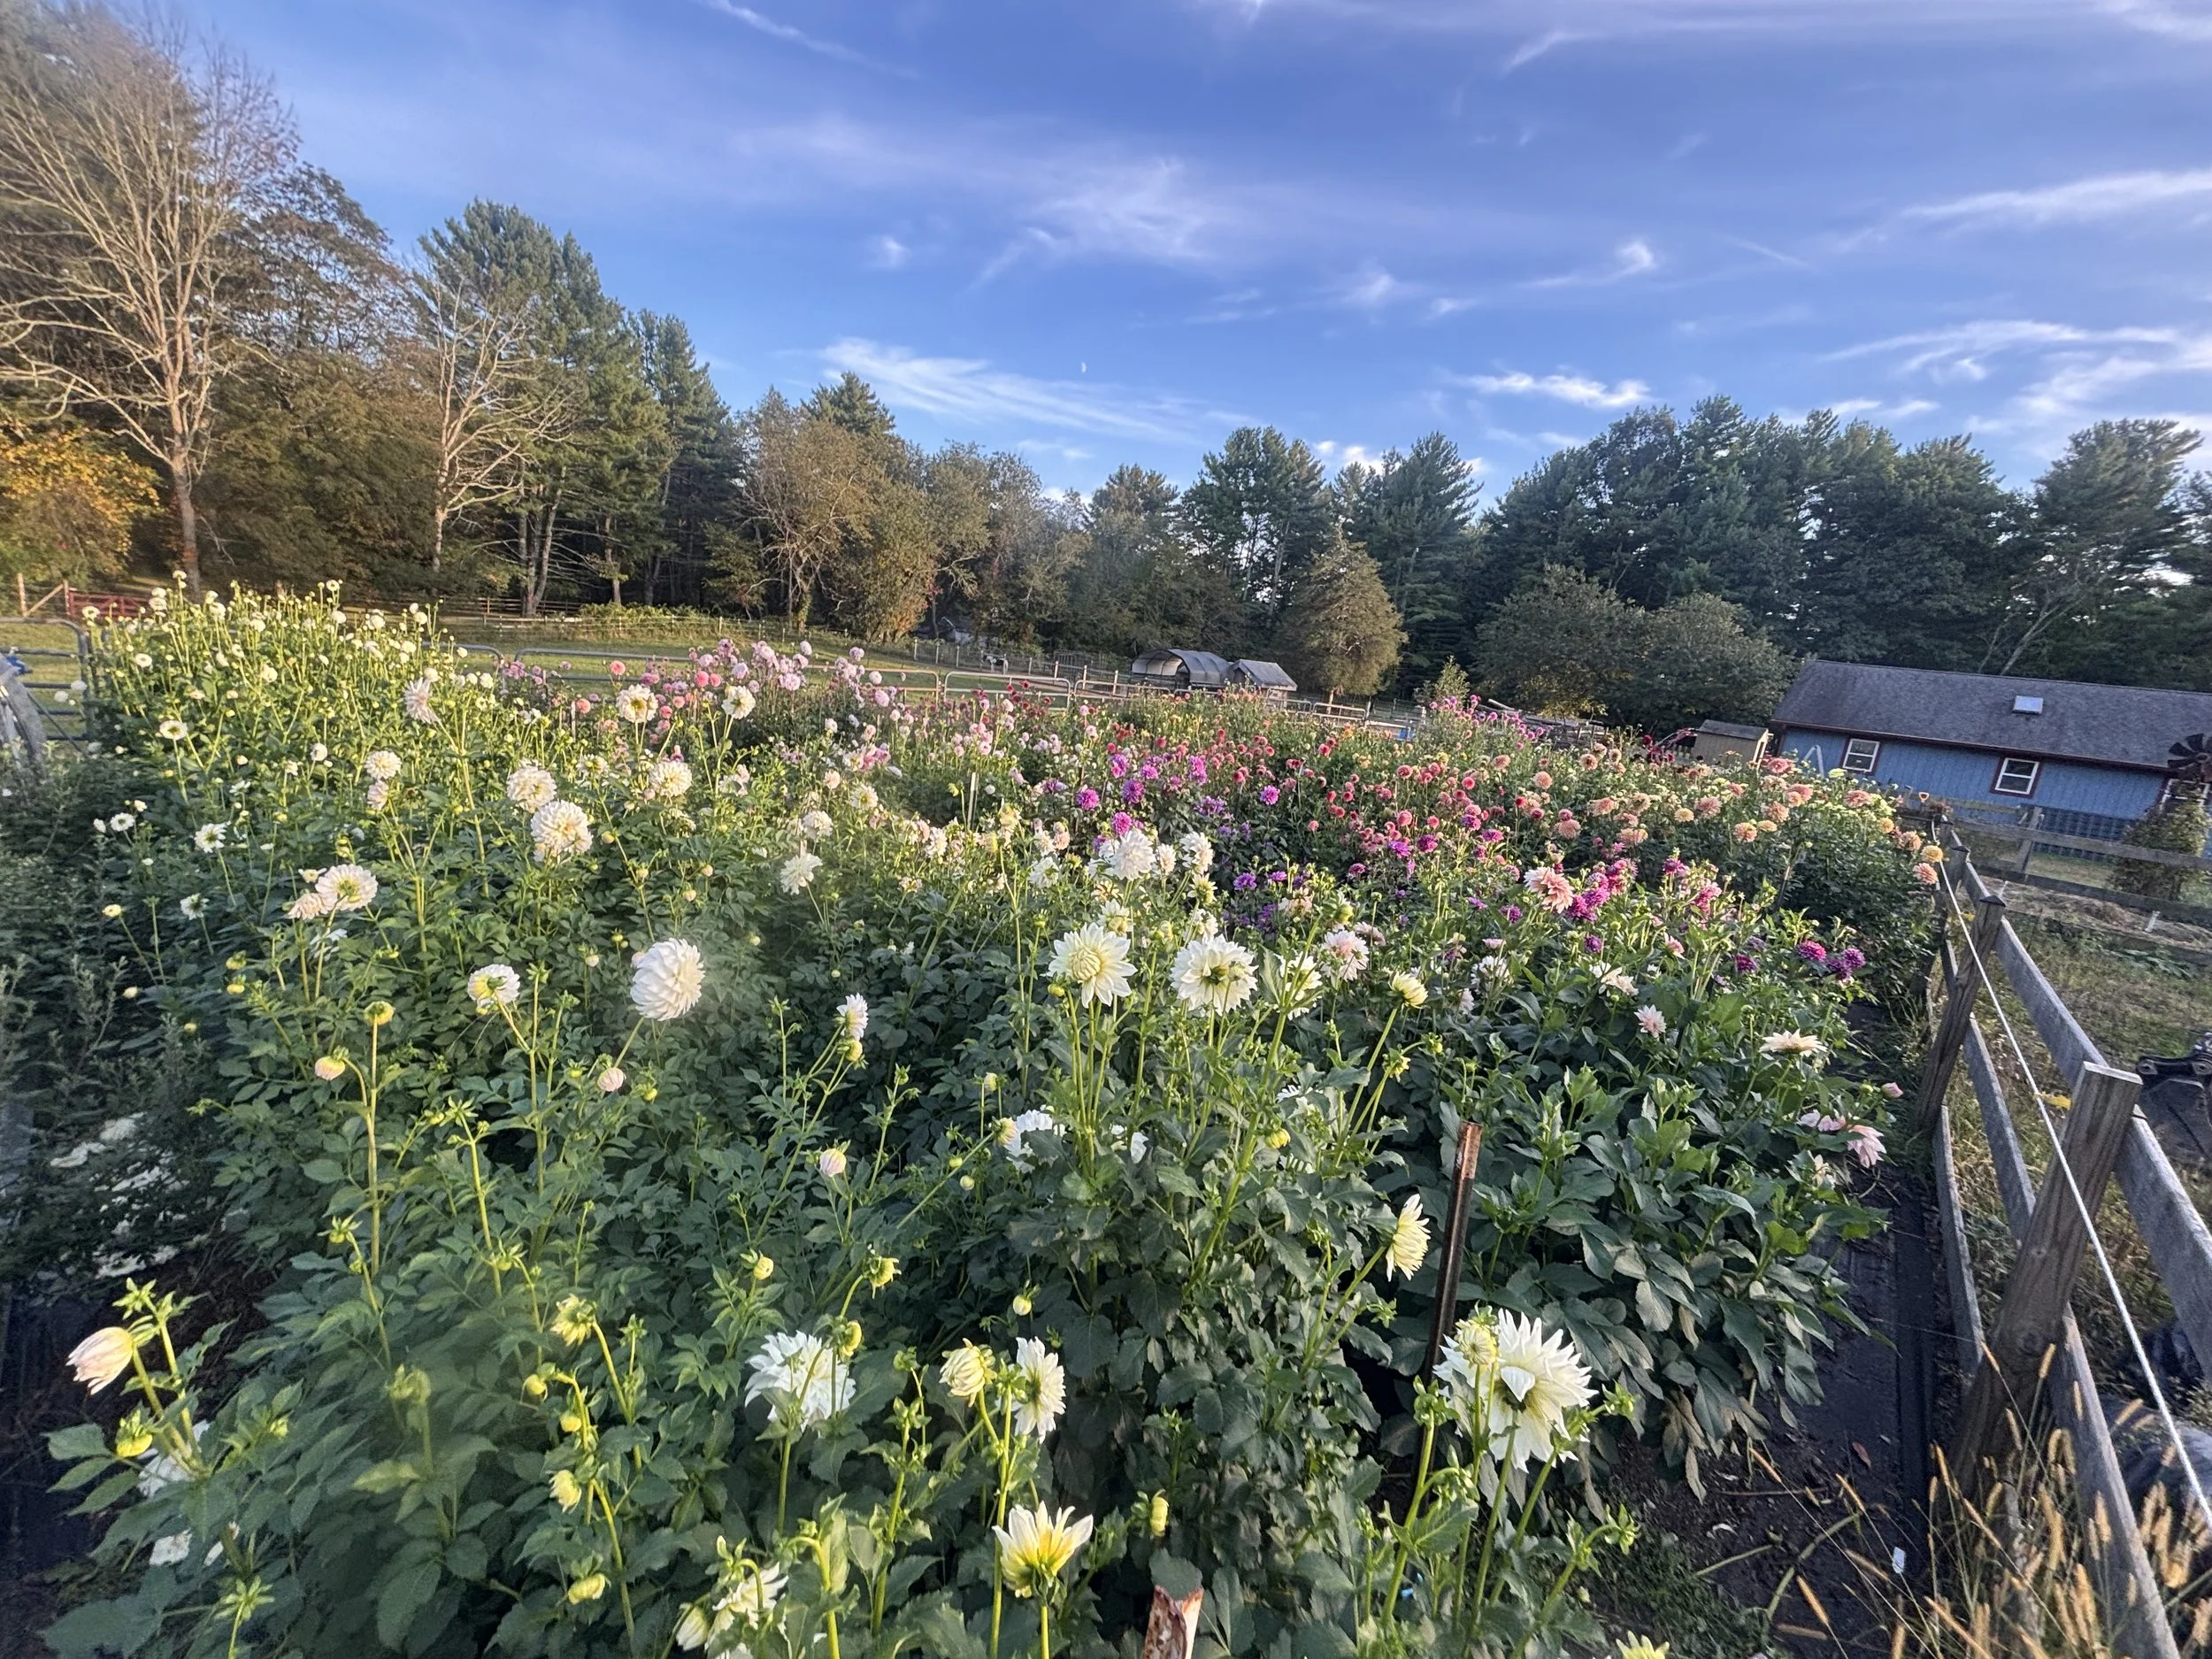
❋ Ideal growing conditionsDahlias are native to the mountainous regions of Mexico. They like to grow in full sun locations in fertile, well-drained soil. Emphasis on the well-drained soil part - if soil becomes waterlogged, especially before the presence of above-ground growth, they will be susceptible to rot. They do not thrive in excessive heat, so as they grow on through peak summer, they may show signs of stress such as petal and foliage discoloration and irregularities in bloom shape, such as blown centers. They will correct themselves as the temperatures come back down in late summer and into fall, which is their time to shine! As the plant gets larger, so does the clump of tubers underground. For this reason, we recommend planting in the ground. If you need to plant in containers, make sure it has drainage, and use at least a 5-7 gallon container for a single tuber (remember, that one tuber is going to multiply into many). Additionally, many of the cultivars on the market get pretty tall and/or have large, heavy flowers, making support necessary. If you’re growing only a few, you could use a tomato cage or something similar on each plant or a stake your plants. If you’re growing as many as we do, we corral them using T-posts and a perimeter of baling twine.
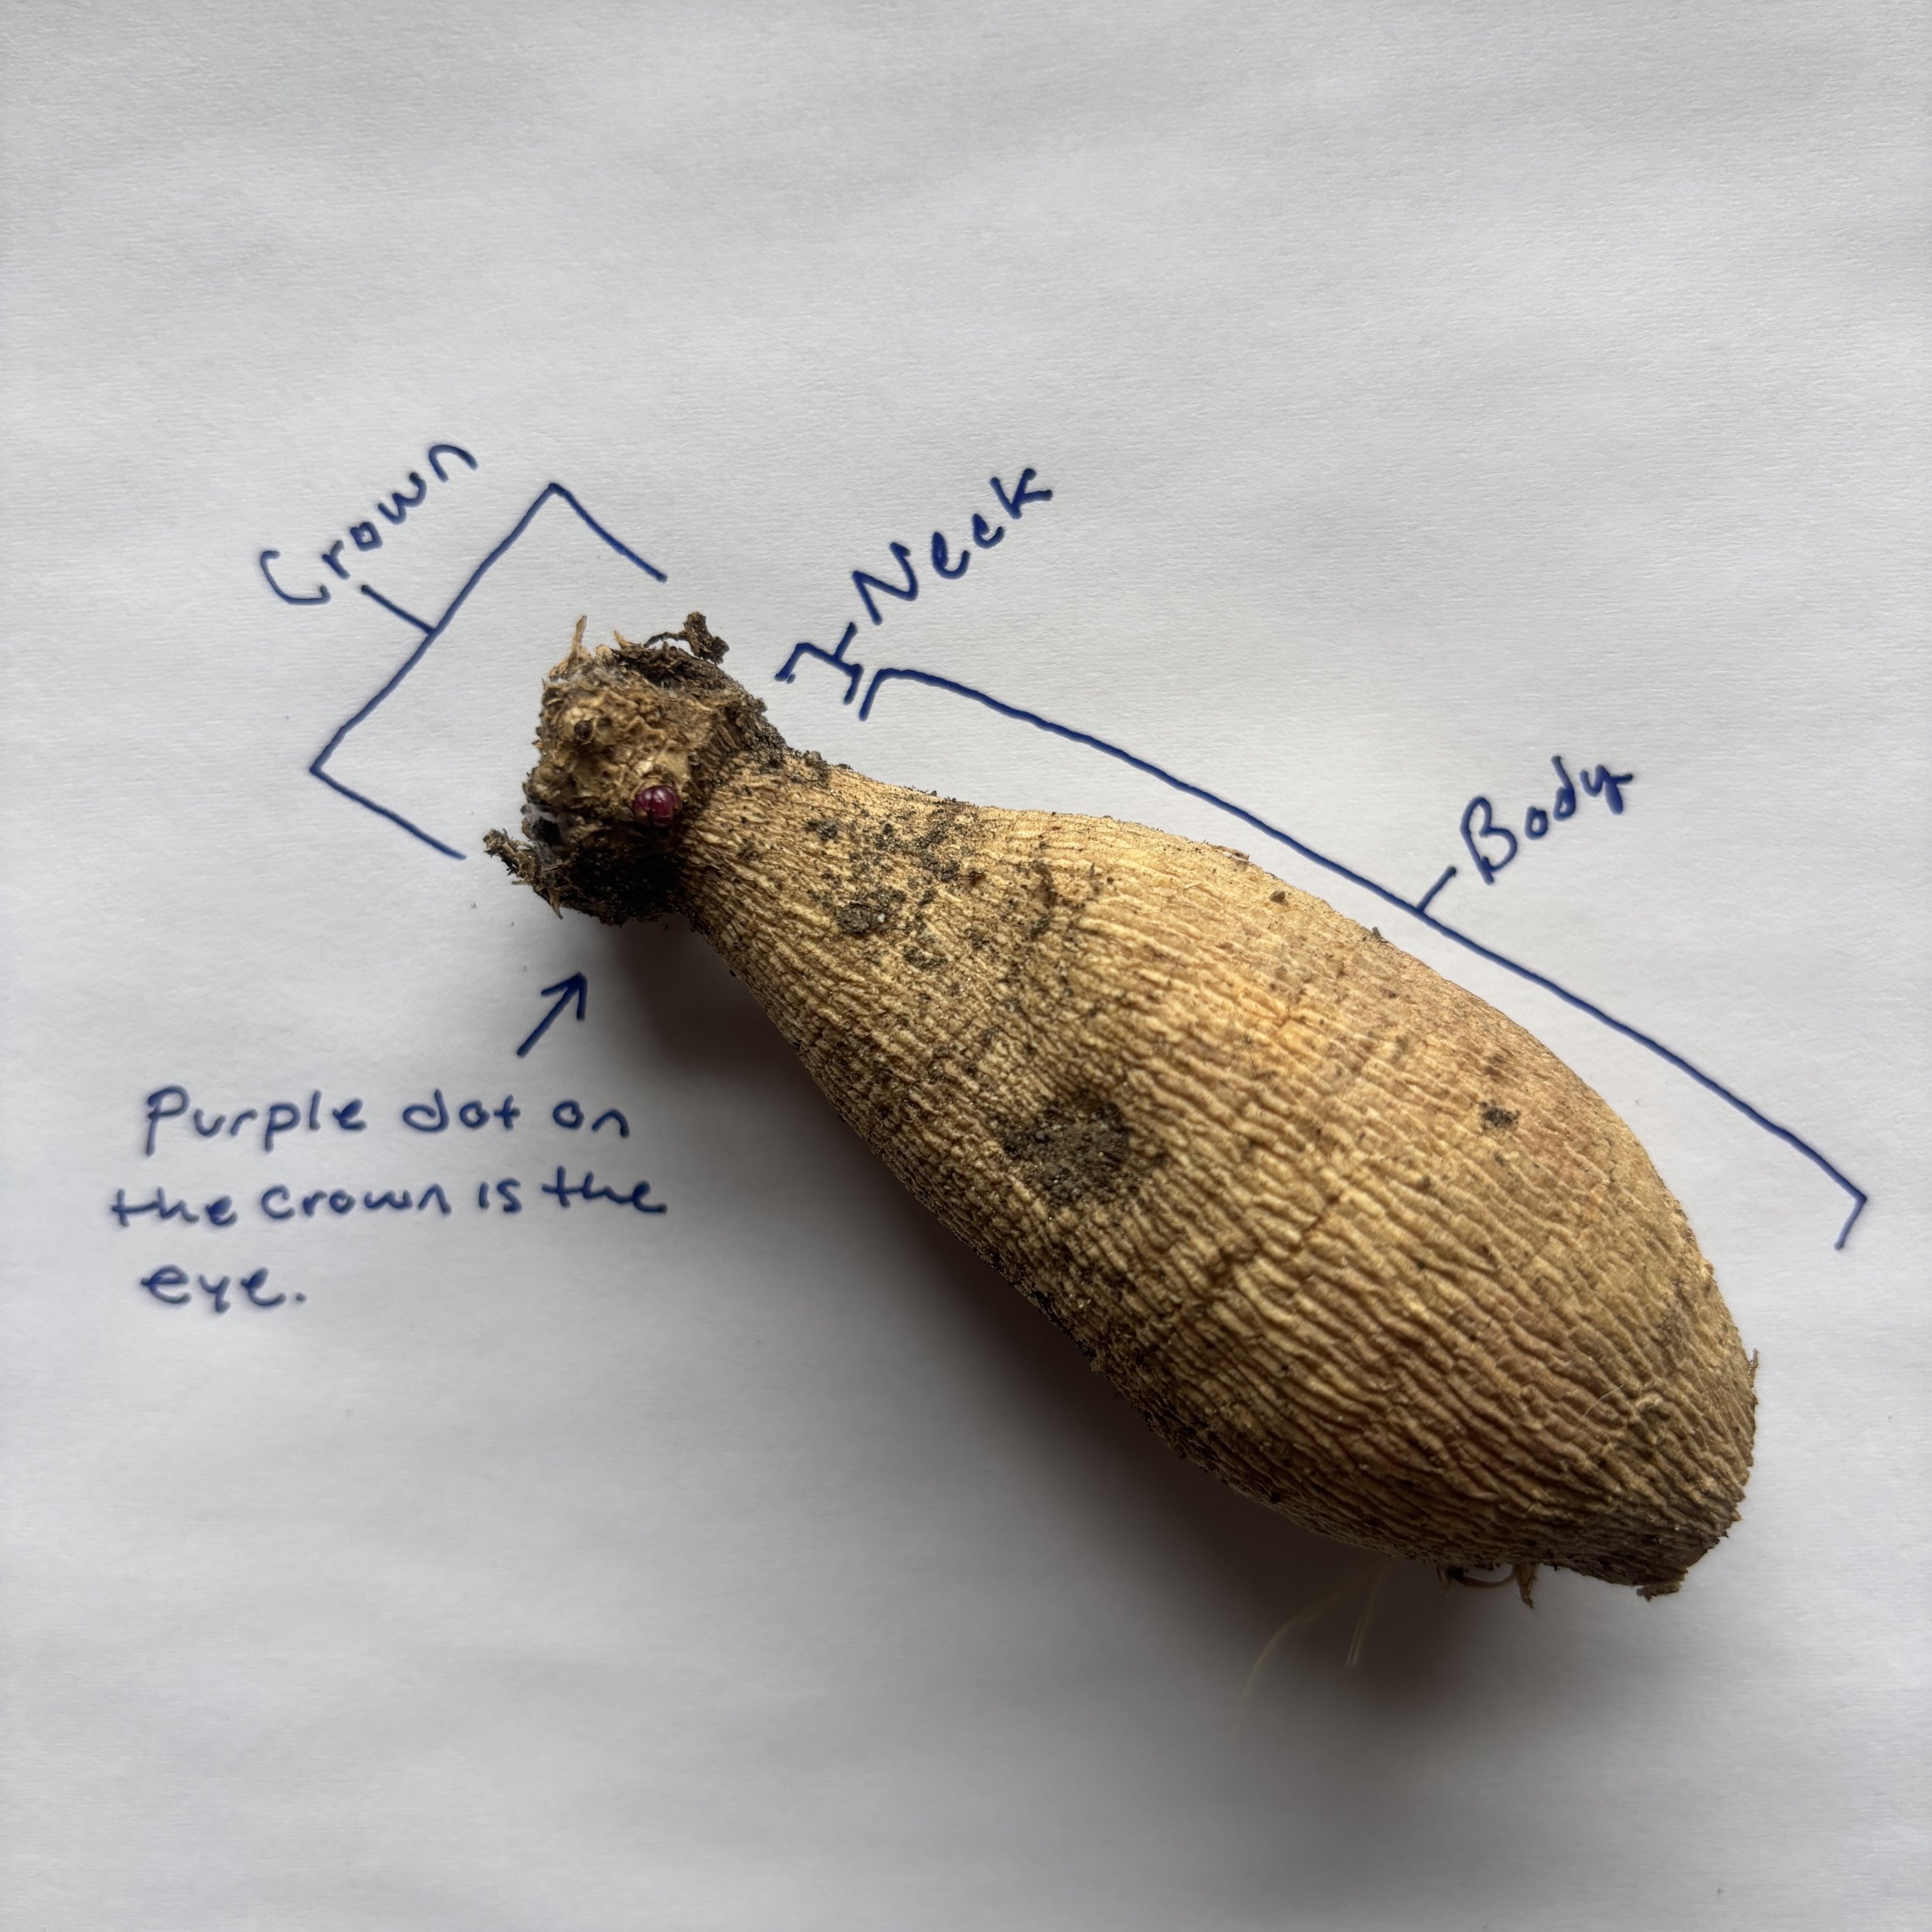
❋ Anatomy of a dahlia tuberFor a tuber to be viable and produce a plant, it needs 3 anatomical parts to be present: the crown, the neck, and the body (see photo). The crown is where the eyes form and swell, ultimately turning into sprouts that will become the part of the plant we see growing above the ground. The neck connects the body to the crown. It may seem obvious and simple, however it is a vital piece of the overall picture. Without an intact, viable neck, the body will not be able to feed the crown, where the active growth is happening. The body is where all the tuber’s nutrients and energy are stored that sustain the tuber until it is time for planting, when it can send out roots to feed off the soil. The body is the largest part of the tuber and can sustain minor damage and cutting without causing any future growing problems - although best practice, especially for new growers is to have fully intact tubers.
❋ Ready to plant?After the threat of frost has passed in spring, select and prepare your planting site. Choose a site in full sun in well-drained, fertile soil free of compaction, large rocks, and weeds. Be sure the soil is moist but not waterlogged or muddy.
Dig a hole about 6” deep and place your tuber in the hole with the eye(s) facing upward.
Cover the tuber with the loose soil. You can rake or press the soil lightly into place, but do not heavily compact the soil, as you will risk breaking the tuber.
Mark with a plant label to know what variety and where you planted.
While you are still aware of the placement of your tuber (or even before placing the tuber in the ground, if possible), we recommend installing any physical supports to avoid later cutting through your tuber by pushing support structures into the soil.
If planting more than one tuber, be sure to space them at least 12” apart.
Water only once you see above-ground growth. This could take as little as 2-3 weeks and as much as 6 weeks, and means the tuber will have set out roots and will be able to use any water introduced to its environment. Only water once the soil is dry. If you’re not sure, stick your finger in the soil a few inches down. If it’s moist and your plant looks happy, you likely don’t need to water yet.
OPTIONAL: If you don’t mind waiting a couple extra weeks for flowers, when plants are 8-12” tall, we encourage “pinching” them by removing the top 3-4” of growth from the center stalk. This encourages a bushier plant, with more flowers and longer stems. We do this to ALL of our dahlias, and the reward is so worth the wait.
❋Additional NotesWhen harvesting your dahlias for cut flowers, cut when flowers are 3/4 of the way open, before the pollen center is exposed, for the best vase life. This will look different depending on the variety, so feel free to reference the photos on our website - all of these flowers were harvested at the optimal stage.
Pests. We all have them. Deer, woodchucks, and rabbits will munch on dahlias above ground, and ground-dwelling rodents have been known to cause damage below ground. If you planted a firm, healthy-looking tuber with visible eyes/sprouts that never came up after planting, chances are that it either rotted or got eaten - kind of like tulips! Do your best to protect your plants by planting inside a fence, monitoring your area, and doing what you can to deter pests from the area. For the underground pests, some growers put hardware cloth under their growing site. This is labor-intensive, and we have never done this on the farm.
Japanese beetles. Every year, like clockwork, they show up for what feels like the whole month of July and absolutely devour everything in sight. We do our best not to introduce harmful sprays, so we recommend using the Japanese beetle pheromone traps. There are many commercially available traps that are highly effective when used according to the manufacturer’s instructions. You may still see some damage, but they do help decrease the amount. You could also use organza bags on individual blooms. Just be sure to get bags large enough to accommodate the bloom size, and place the bags on unopened buds.
Dahlias have hollow stems and central stalks, which can become a haven for any type of pest that likes to bore into things (think corn borers and vine borers). Our experience is limited with this, but signs often include blackened, dead plant tissue and an accumulation of sawdust-looking material (feces). When this happens, we cut the plant back to below the affected area and “keep an eye on it”. This will significantly delay flowering of the plant, but dahlias want to grow and they will recover over time. Plus: you’ll still get the tubers in the fall, so not all is lost!